Using donation buttons are the simplest and quickest way to begin
monetizing a WordPress site. In this tutorial, I will show you how to
use Stripe Payments to accept donations from your site easily.
Getting a Stripe account at stripe.com
is quick and easy. Barring approval complications, it should take no
more than 5 minutes to sign up, and activate your account. Compared to
other payment processors, only a minimal amount of personal information
is required. You will however, need a valid bank checking account, in
order to successfully activate your Stripe account.
Once your Stripe account has been activated, download, install and activate the WordPress Stripe Payments plugin.
Stripe API Key Setup
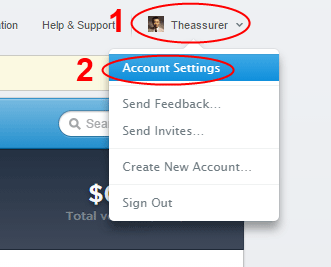
Next, you will need to know what your Stripe API Keys are. You find out what your API Keys are by going to Account Settings, after you are logged into your Stripe Account, and then selecting the API Keys tab.
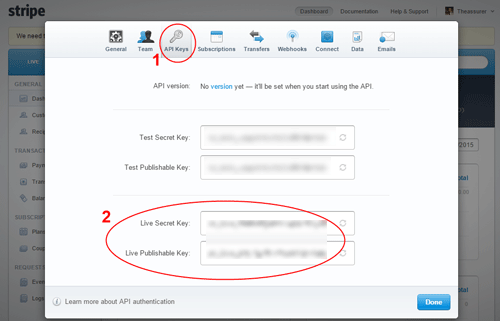
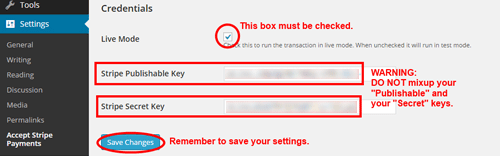
Your Stripe account has 2 sets of keys, a “Test” and a “Live” set.
For our purposes, we are only concerned with the “Live” set of keys.
Each set of keys contains a public “Publishable” key and a personal
“Secret” key. It is important that you NEVER mixup or confuse your “Publishable” and your “Secret” keys.
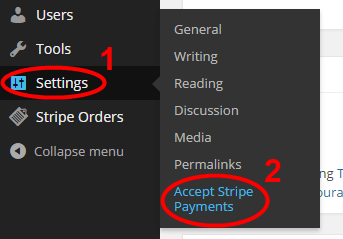
You’ll then copy your Live API Keys into the Credentials section of
the Stripe plugin. When copying the keys from the Stripe API Keys tab,
be careful not to copy trailing spaces when you select the key values.
Accidental copy/paste of trailing spaces accounts for almost all API Key
authentication errors. Also be careful not to mix-up and paste the
wrong value into the plugin’s API Key fields.
Creating the Stripe Donation Button
At this point, you are now ready to create your first donation button on a post or page.
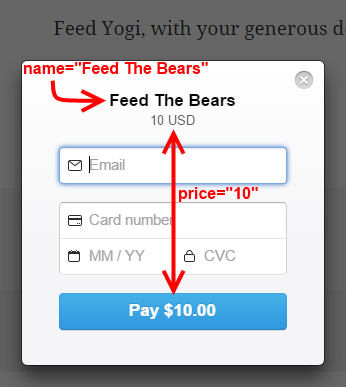
In this example, we are creating a $10 donation button, for the “Feed
The Bears” cause. Our shortcode uses the following attributes:
- Name of our cause: name=”Feed The Bears”
- Quantity is non-applicable to donation buttons: quantity=”n/a”
- Price we are asking for: price=”10″
- Button text: button_text=”Donate Now”
Our completed shortcode would then look like this:
[accept_stripe_payment name=”Feed The Bears” quantity=”n/a” price=”10″ button_text=”Donate Now”]

Because the shortcode only renders the actual donation button, you
would need to precede the shortcode with your own donation pitch. This
gives you the freedom to say whatever message you want to add just above
or below the donation button.
Interacting with the Donation Button
Your visitors can now click on the donation button to send a donation to you.
When the button is clicked, a “Checkout” form appears as a screen
overlay so the visitor can enter the credit card details and make the
payment.
No comments:
Post a Comment